Set up your Home Wireless Broadband
Your modem will take care of the hard stuff like internet settings, but we’ll need your help to plug it in. The main cables you need will come in the box, and you can grab extra Ethernet cables from the shops if you need them.
Note: Your TPG 4G SIM is already inside your modem. Please don't remove it because the SIM won't work in other devices.
Choose your modem to get started:
| Picture | Modem |
|---|---|
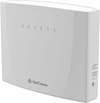
| NetComm NL20 Modem | |
| VX420-G2H Modem | |
| Cube 3 | |
| TP-Link MR600 Modem |
How to plug in your NetComm NL20 Modem for Home Wireless Broadband
- Find a good spot for your modem. It's best to choose a clear, open location on a shelf or table - ideally near a window.
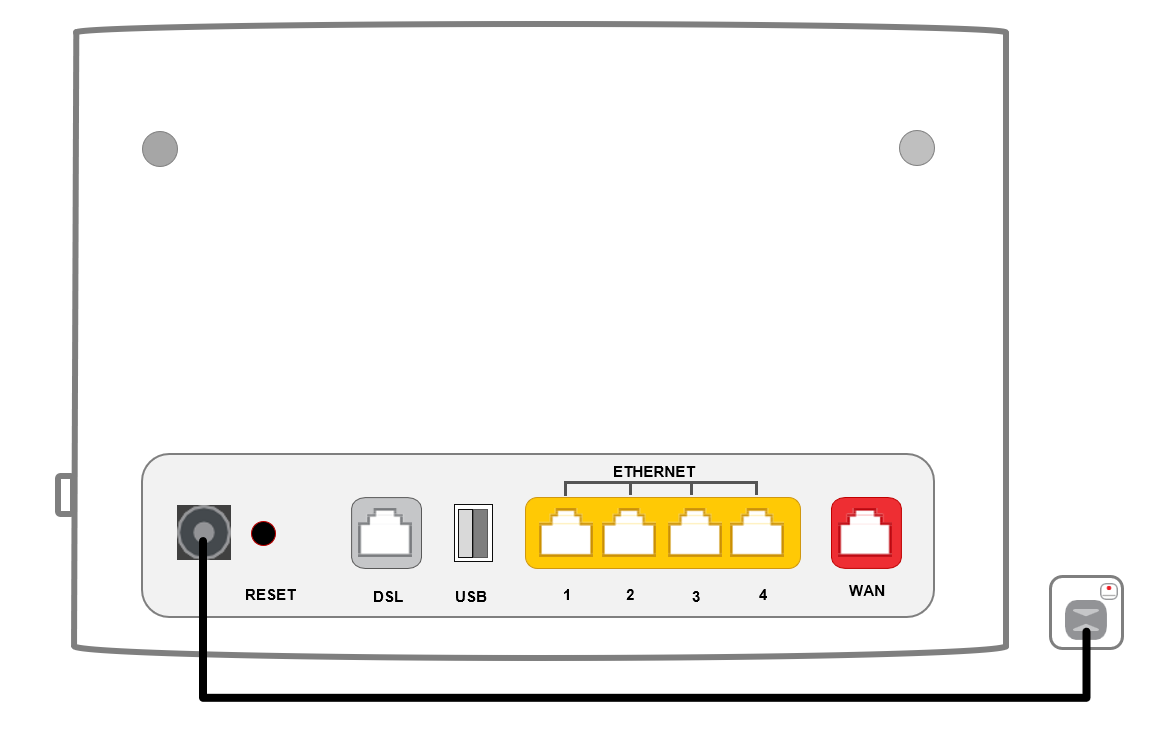
You can try different spots if your first spot isn’t giving you a strong signal. Don't put your modem on the floor or inside a cupboard because this will cause a weak signal. - Use the power cable to plug your modem's Power port into a power outlet and press the ON/OFF button on the side of the modem.
- Check the 4G light on the front your modem. If it's green or orange you’re online and you can start connecting your devices.
- If the 4G light is off or red, try moving your modem to a different spot.
No 4G light or can't get a good signal? Give us a call on 1300 997 271 and we'll help you out. - Connect your devices. If you have extra ethernet cables, you can connect 4 devices to your modem’s yellow LAN ports.
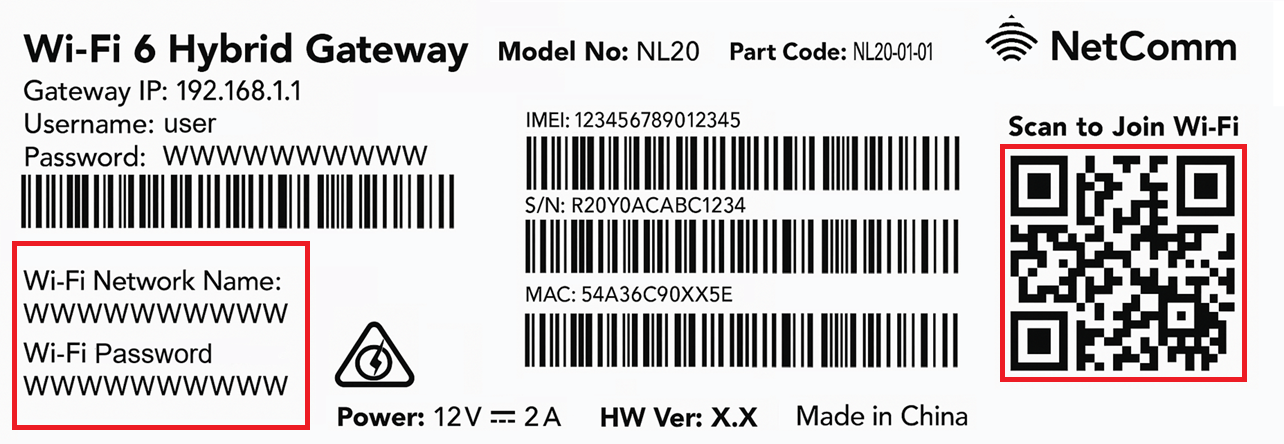
If you want to connect your devices via Wi-Fi, you have 3 options:- Use the Wi-Fi Network name and Password on your modem's barcode sticker.
- Scan the QR code on your modem's barcode sticker (Smartphones only).
- Enable Wi-Fi Protected Setup (WPS) in your modem dashboard, then press the WPS button on the side of your modem for 3 seconds.
- Your devices will automatically connect to the best Wi-Fi possible. If your Wi-Fi’s running slow, check out Improving Wi-Fi Signal.
Please note that Home Wireless Broadband is not suitable for 4K streaming or online gaming. Learn more. - Once your devices are connected, you're good to go.
How to plug in your VX420-G2H Modem for Home Wireless Broadband
-
Find a good spot for your modem. It's best to choose a clear, open location on a shelf or table - ideally near a window.
You can try different spots if your first spot isn’t giving you a strong signal. Don't put your modem on the floor or inside a cupboard because this will cause a weak signal. -
Use the power cable to plug your modem's Power port into a power outlet and press the ON/OFF button.
-
Leave your modem alone for 3-5 minutes while it runs through its automatic setup.
-
Check the 4G light on your modem. If it's green or yellow, you’re online with a good signal and you can start connecting your devices.
-
If the 4G light is off or red, try moving your modem to a different spot.
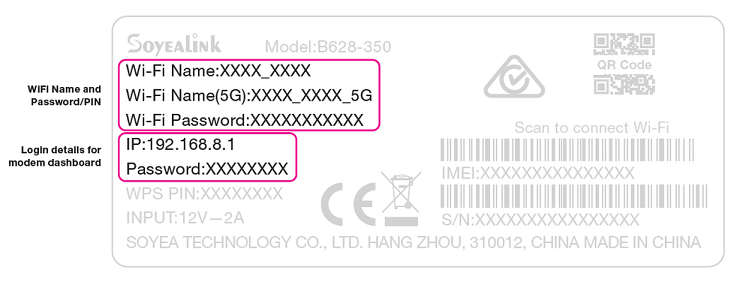
No 4G light or can't get a good signal? Give us a call on 1300 997 271 and we'll help you out. - You'll find the default Wi-Fi name (SSID) and Wireless Password/PIN on your modem's barcode sticker. If you want to change your Wi-Fi name and password, use this guide.
- Your devices will automatically connect to the best Wi-Fi possible. If your Wi-Fi’s running slow, check out Improving Wi-Fi Signal.
- For HD streaming, Ethernet is better than Wi-Fi. If you have extra Ethernet cables, you can connect up to 4 devices to your modem’s yellow LAN ports.
Please note that Home Wireless Broadband is not suitable for 4K streaming or online gaming. Learn more. - Once your devices are connected, you're good to go.
How to plug in your Cube 3 modem for Home Wireless Broadband
-
Find a good spot for your modem. It's best to choose a clear, open location on a shelf or table - ideally near a window.
You can try different spots if your first spot isn’t giving you a strong signal. Don't put your modem on the floor or inside a cupboard because this will cause a weak signal. -
Use the power cable to plug your modem's Power port into a power outlet and press the Power button on the base.
-
Leave your modem alone for 2-3 minutes while it runs through its automatic setup.
-
Check the 4G light on your modem. If it's green or yellow, you’re online with a good signal and you can start connecting your devices.
-
If the 4G light is red, try moving your modem to a different spot.
Can't get a good signal? Give us a call on 1300 997 271 and we'll help you out. -
You'll find the default Wi-Fi name and Password on your modem's barcode sticker. If you want to change your Wi-Fi name and password, use this guide.
We recommend connecting devices to both Wi-Fi names so your devices will automatically connect to the best Wi-Fi possible. If your Wi-Fi’s running slow, check out Improving Wi-Fi Signal. - For HD streaming, Ethernet is better than Wi-Fi. If you have extra Ethernet cables, you can connect up to 2 devices to your modem’s LAN ports.
Please note that Home Wireless Broadband is not suitable for 4K streaming or online gaming. Learn more. - Once your devices are connected, you're good to go.
How to plug in your TP-Link MR600 Modem for Home Wireless Broadband
-
Find a good spot for your modem. It's best to choose a clear, open location on a shelf or table - ideally near a window.
You can try different spots if your first spot isn’t giving you a strong signal. Don't put your modem on the floor or inside a cupboard because this will cause a weak signal. -
Attach the antennas and move them into an upright position, bunny-ears style.
-
Use the power cable to plug your modem's Power port into a power outlet and press the ON/OFF button.
- Leave your modem alone for 5 minutes while it runs through its automatic setup.
-
Check the Signal lights on your modem. If you have 2-3 bars, you’re online with a good signal and you can start connecting your devices.
-
If the 4G light is off or you only have 1 bar, try moving your modem to a different spot.
No 4G light or can't get a good signal? Give us a call on 1300 997 271 and we'll help you out. - You'll find the default Wi-Fi name (SSID) and Wireless Password/PIN on your modem's barcode sticker.
We recommend connecting devices to both Wi-Fi SSIDs so your devices will automatically connect to the best Wi-Fi possible. If your Wi-Fi’s running slow, check out Improving Wi-Fi Signal. - For HD streaming, Ethernet is better than Wi-Fi. If you have extra Ethernet cables, you can connect up to 4 devices to your modem’s yellow LAN ports.
Please note that Home Wireless Broadband is not suitable for 4K streaming or online gaming. Learn more. - Once your devices are connected, you're good to go.


